In Part 1 of this series we installed IIS.
In Part 2 we installed and configured WebDAV.
In Part 3 we installed BITS and Remote Differential Compression.
In Part 4 we created a ConfigMgr administrator group and installed and configured SQL Server 2008.
The active directory schema must be extended and a System Management container must be created and configured before installing ConfigMgr.
This chapter will guide you through the process of extending the Active Directory schema and creating and configuring a System Management container.
Run extadsch.exe
- Log into the schema master server using the domain Administrator account.
- Insert the ConfigMgr DVD into the DVD ROM drive.
- Browse to the root of the DVD, and then browse to \SMSSETUP\BIN\I386.
- Double-click on EXTADSH.EXE.
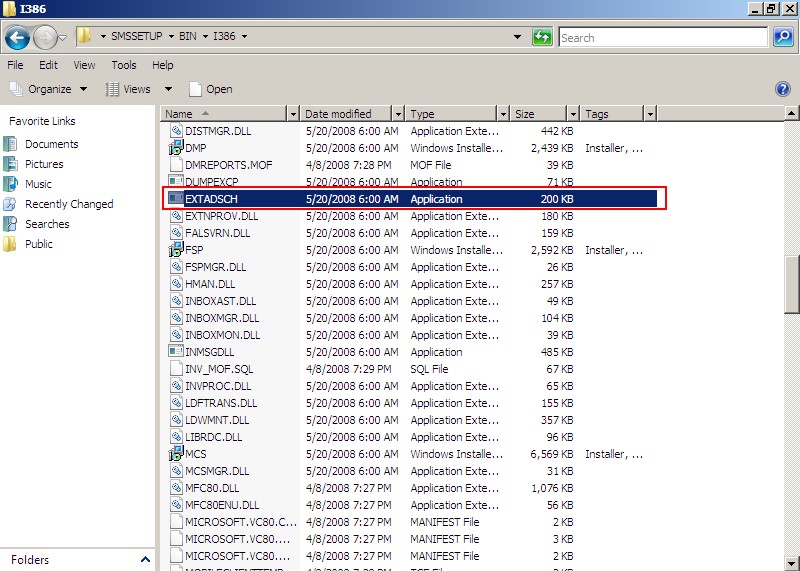
- Wait for the CMD Prompt window to close.
- Browse to the root of C:\ and open ExtAdSch.log in Notepad.
- Look through ExtAdSch.log for a line that reads Successfully extended the Active Directory schema.
- Close ExtAdSch.log.
Create the System Management Container:
- Go to Start>Administrative Tools and click on ADSI Edit.
NOTE: On Windows Server 2003, you will need to install the ADSI Edit MMC snap-in. Refer to the following link for more information: http://technet.microsoft.com/en-us/library/cc773354(WS.10).aspx
- Click on Actions and click on Connect To in the ADSI Edit window.
- Click OK in the Connection Settings window.
- Expand <domain>, expand <distinguished name>, right-click CN=System, click New, and then click Object.
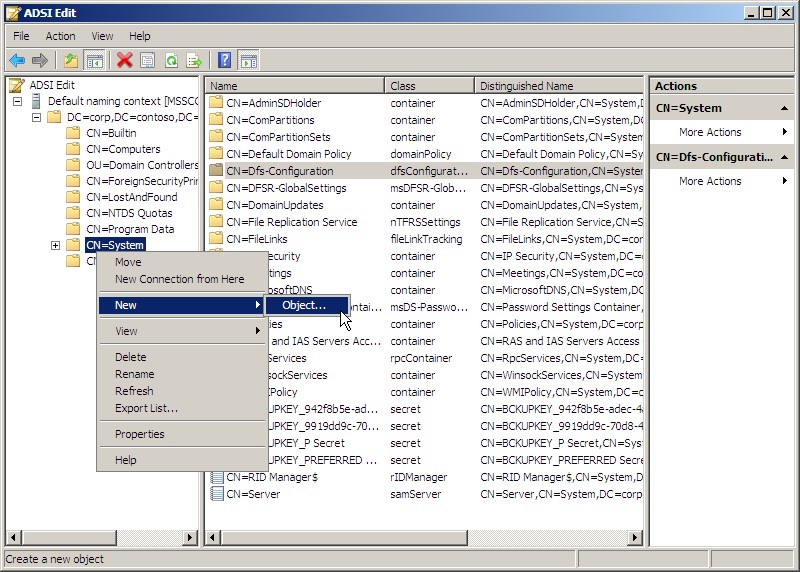
- Select container in the Create Object window, and then click Next.
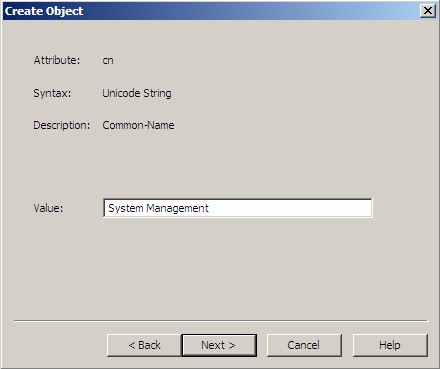
- In the Value box, type System Management, and then click Next.
- Click Finish.
- Expand CN=System, right-click System Management, and then click Properties.
- Click on the Security tab in the CN=System Management Properties window, and then click the Add button and add the ConfigMgr Site server’s computer object with Full control permissions, and then click Apply.NOTE: If the ConfigMgr Site server is going to be separate from the Active Directory Domain Services server, the ConfigMgr Site server’s computer object will need to have Full control permissions to the System Management container. You may have to put a check mark next to Computers in Object Types when adding/checking the name.
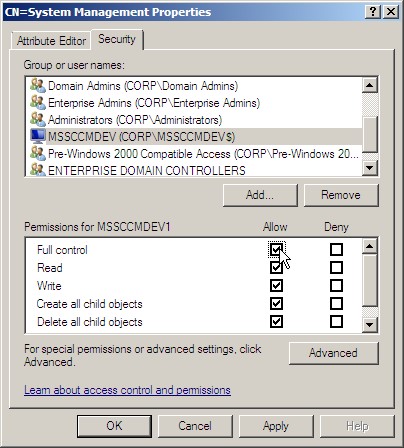
- Click on the Advanced button.
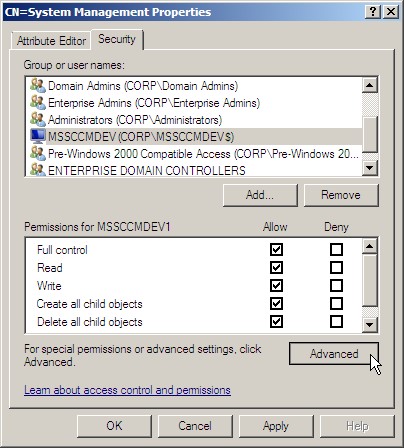
- In the Advanced Security Settings for System Management window, on the Permissions tab, select the entry for the ConfigMgr Site server’s computer object, and then click the Edit button.
- Change the value next to Apply to from This object only to This Object and all descendant objects, and then click OK.

- In the Advanced Security Settings for System Management window, click Apply, and then click OK.
- Click OK in the CN=System Management Properties window.
- Close the ADSI Edit window.
Next in Part 6: Installing Report Viewer 2008