Introduction
After spending some time on Reddit and various IT communities, I noticed the same question coming up repeatedly.
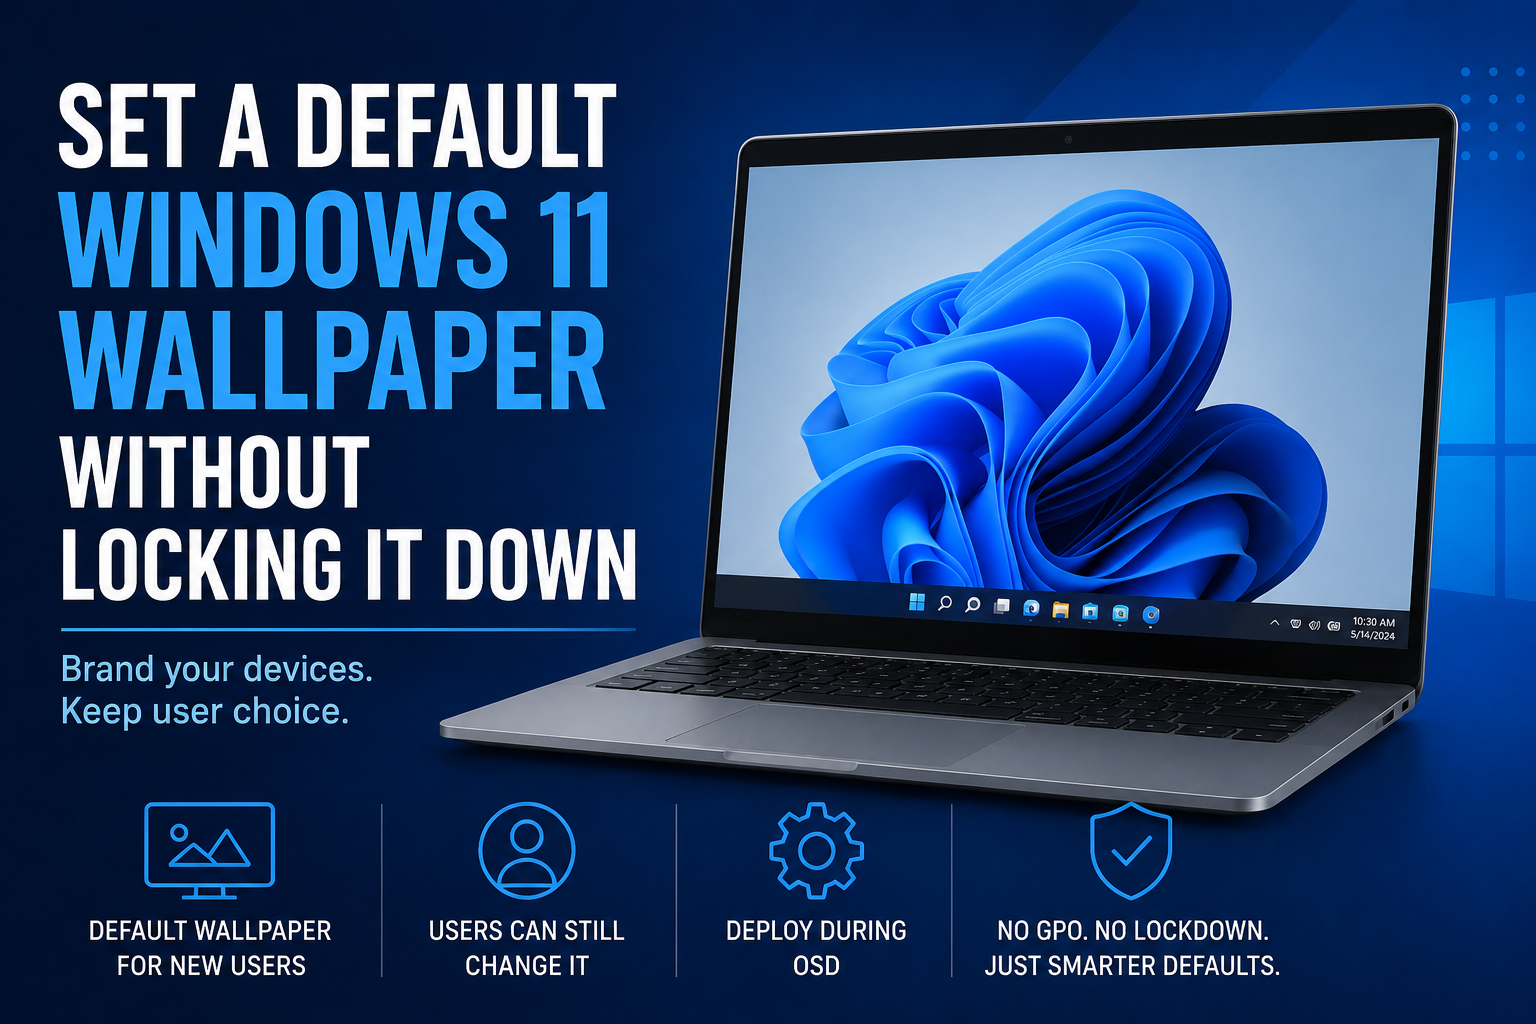
How can I set a custom wallpaper in Windows 11 via OSD without locking it down?
Most of the answers point people toward Group Policy or Intune wallpaper policies. Those work, but they permanently enforce the wallpaper and remove the user’s ability to personalize their desktop.
If your goal is to provide a default corporate wallpaper while still allowing users to choose their own background later, Windows themes are a much better solution.
This article walks through the process I use during Operating System Deployment (OSD) to configure a default Windows 11 wallpaper that applies to every new user profile without locking anything down.
Why Group Policy Isn’t Always the Right Choice
When you configure a wallpaper through:
- Group Policy
- Group Policy Preferences
- Intune Personalization CSP
- Settings Catalog wallpaper policies
Windows enforces the configured image.
Some organizations simply want new devices to have a branded appearance when users sign in for the first time.
After that, they don’t care.
How Windows Themes Handle Wallpapers
Windows stores wallpaper settings inside theme files.
A theme can contain:
- Wallpaper configuration
- Color settings
- Sounds
- Mouse pointers
- Other desktop personalization settings
When a user signs in for the first time, Windows applies the theme referenced in that user’s profile.
By configuring the Default User profile during OSD, every future user receives the same theme automatically.
Because Windows treats the wallpaper as part of a theme instead of a policy, users remain free to change it later.
Create the Theme
Step 1: Open Classic Theme Settings
Launch:
shell:::{ED834ED6-4B5A-4bfe-8F11-A626DCB6A921}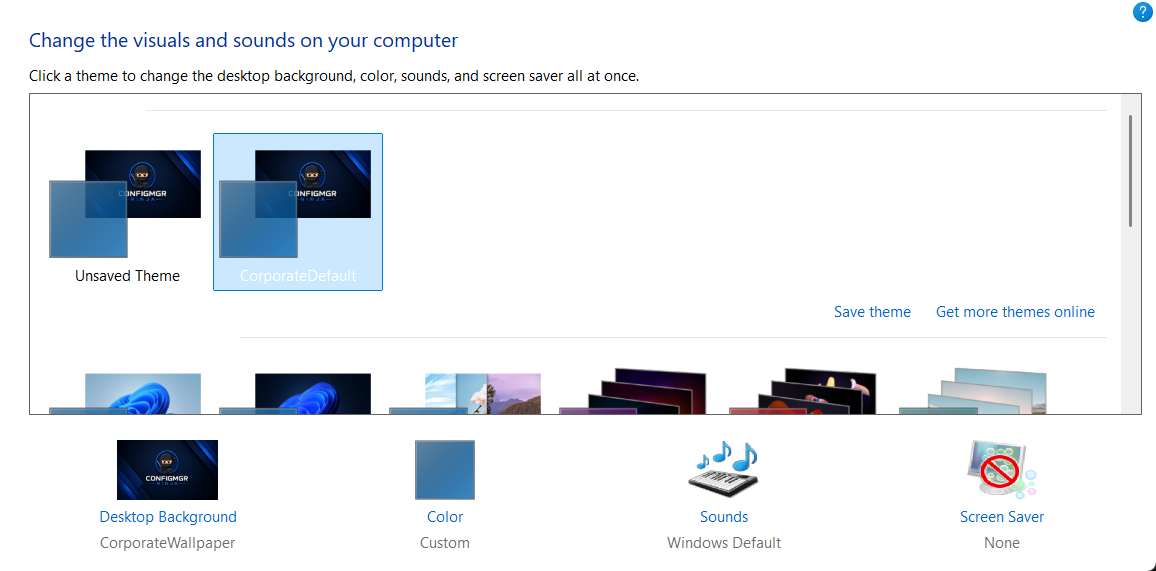
Step 2: Select Your Wallpaper
Choose the wallpaper you want users to receive by default.
For this example:
CorporateWallpaper.jpgStep 3: Save the Theme
Save the theme as:
CorporateDefault.theme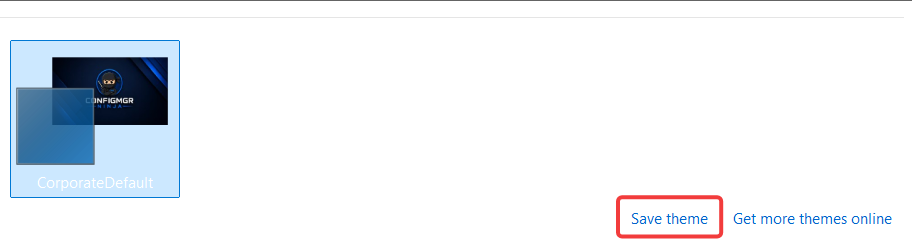
Step 4: Edit the Theme File
Open the .theme file in Notepad.
Saved .theme files can be found at:
%localappdata%\Microsoft\Windows\ThemesLocate the wallpaper path.
You’ll typically see something similar to:
Wallpaper=%USERPROFILE%\Pictures\CorporateWallpaper.jpgUpdate it to the final deployment location:
Wallpaper=%SystemRoot%\Web\Wallpaper\Windows\CompanyName\CorporateWallpaper.jpgSave the file.
Folder Structure
The deployment copies files to:
C:\Windows\Web\Wallpaper\Windows\CompanyNameWallpaper:
C:\Windows\Web\Wallpaper\Windows\CompanyName\CorporateWallpaper.jpgTheme:
C:\Windows\Resources\Themes\CorporateDefault.themeResult:
C:\Windows
├─ Resources
│  └─ Themes
│     └─ CorporateDefault.theme
│
└─ Web
   └─ Wallpaper
      └─ Windows
         └─ CompanyName
            └─ CorporateWallpaper.jpg
Configure the Default User Profile
The key to making this work during OSD is modifying the Default User profile.
Every future user profile is created from this template.
Load the Default User Hive
& reg.exe load "HKLM\TempDefault" "C:\Users\Default\NTUSER.DAT"Configure the Theme
$ThemeKey = "Registry::HKEY_LOCAL_MACHINE\TempDefault\Software\Microsoft\Windows\CurrentVersion\Themes"
$ThemeDestination = Join-Path $ThemeFolder "CorporateDefault.theme"

Set-ItemProperty `
    -Path $ThemeKey `
    -Name "CurrentTheme" `
    -Value $ThemeDestination `
    -ErrorAction Stop

Set-ItemProperty `
    -Path $ThemeKey `
    -Name "ThemeFile" `
    -Value $ThemeDestination `
    -ErrorAction Stop
Configure the Wallpaper
$DesktopKey = "Registry::HKEY_LOCAL_MACHINE\TempDefault\Control Panel\Desktop"
$WallpaperDestination = Join-Path $WallpaperFolder "CorporateWallpaper.jpg"

Set-ItemProperty `
    -Path $DesktopKey `
    -Name "Wallpaper" `
    -Value $WallpaperDestination `
    -ErrorAction Stop
Notice that we’re modifying the loaded Default User hive and not HKCU.
At this stage there isn’t a logged-on user.
Disable Windows Spotlight
Windows Spotlight can replace your wallpaper after profile creation.
To prevent that:
$SpotlightKey = "Registry::HKEY_LOCAL_MACHINE\TempDefault\Software\Microsoft\Windows\CurrentVersion\DesktopSpotlight\Settings"

New-ItemProperty `
    -Path $SpotlightKey `
    -Name "EnabledState" `
    -PropertyType DWord `
    -Value 0 `
    -Force `
    -ErrorAction Stop | Out-Null
Unload the Hive
[GC]::Collect()
[GC]::WaitForPendingFinalizers()

& reg.exe unload "HKLM\TempDefault"
Full PowerShell Script
The full PowerShell script can be downloaded from my GitHub at the following link:
Usage
Place the following files in the same folder as the script:
CorporateWallpaper.jpgCorporateDefault.theme
Your folder structure should look similar to this:
SetDefaultTheme\
├── SetDefaultTheme.ps1
├── CorporateWallpaper.jpg
└── CorporateDefault.theme
Run the script from an elevated PowerShell session:
.\SetDefaultTheme.ps1
If you’d like additional status information displayed during execution, run it with the -Verbose parameter:
.\SetDefaultTheme.ps1 -Verbose
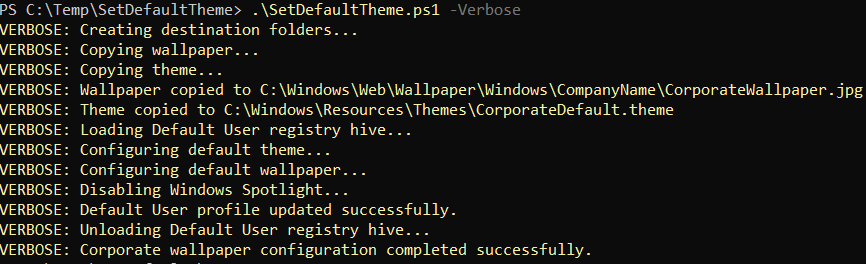
The -Verbose parameter is optional. It displays detailed information about what the script is doing which can be useful for troubleshooting or validating the deployment during testing.
The script copies the wallpaper and theme files to their permanent Windows locations, updates the Default User profile so future users receive the corporate theme automatically, and disables Windows Spotlight to prevent it from replacing the configured wallpaper.
Adding the Script to an OSD Task Sequence
I like to run the script after Windows Setup and ConfigMgr after app installs or near the end of the Task Sequence:
Install Operating System
Apply Drivers
Setup Windows and ConfigMgr
Install Applications
Apply Corporate Wallpaper Theme
Deploying the Wallpaper During Intune Autopilot
If you’re using Intune and Windows Autopilot instead of ConfigMgr OSD, you can deploy this solution during device provisioning and achieve the same result.
Package the wallpaper file, theme file, and PowerShell script into a Win32 application using the Microsoft Win32 Content Prep Tool. This creates an .intunewin package that Intune can deploy during enrollment.
When creating the Win32 app:
- Upload the
.intunewinpackage. - Configure the install command to run the PowerShell script silently.
- Run the app in the System context.
- Create a detection rule that verifies successful installation. For example, check for the theme file in
C:\Windows\Resources\Themesor verify the registry values created by the script.
Assign the application to the device group used for Autopilot deployments and add it to the Enrollment Status Page (ESP) as a blocking application.
This ensures the script runs before the user reaches the desktop for the first time.
This approach works particularly well for organizations moving away from traditional imaging. You get consistent corporate branding during enrollment without maintaining a custom reference image or enforcing a wallpaper through Group Policy or Device Configuration policies.
Verification
After imaging completes:
- Log in with a test account that has never signed into the device.
- Confirm the corporate wallpaper appears.
- Open Personalization settings.
- Change the wallpaper.
- Sign out and back in.
The wallpaper should remain user configurable.