In Part 1 of this series we installed IIS.
In Part 2 we installed and configured WebDAV.
In Part 3 we installed BITS and Remote Differential Compression.
In Part 4 we created a ConfigMgr administrator group and installed and configured SQL Server 2008.
In Part 5 we extended the Active Directory schema and created/configured the System Management container.
In Part 6 we installed Report Viewer 2008.
This section of the guide will walk you through the WSUS Server with Admin Console installation process.
This is not necessary if you already have WSUS Server set up on another machine. WSUS is required for the windows patch deployment feature of SCCM.
- Log into the server that will be used for WSUS with an Administrator account.
- Download the WSUS Server installer.
NOTE: The latest version of WSUS Server installer is available on the Microsoft Web site for Windows Server Update Services at http://go.microsoft.com/fwlink/?Linkid=47374
On Windows Server 2008 R2 the WSUS Server will need to be installed as a role instead. The role can be installed by opening the Server Manager, expanding Roles, and then clicking on Windows Server Update Services. - Double-click the installer to run the installation.
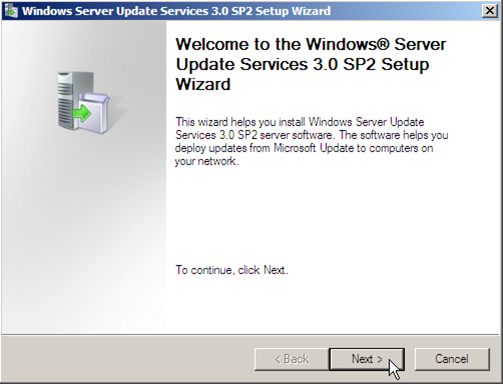
- On the welcome page of the setup wizard, click Next.
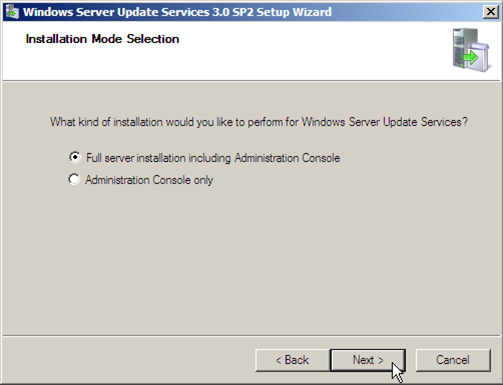
- Verify that Full server installation including Administration Console is selected, and then click Next.
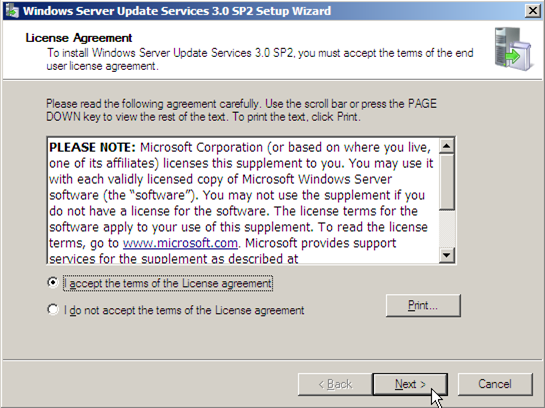
- If you accept the terms, select I accept the terms of the License agreement, and then click Next.
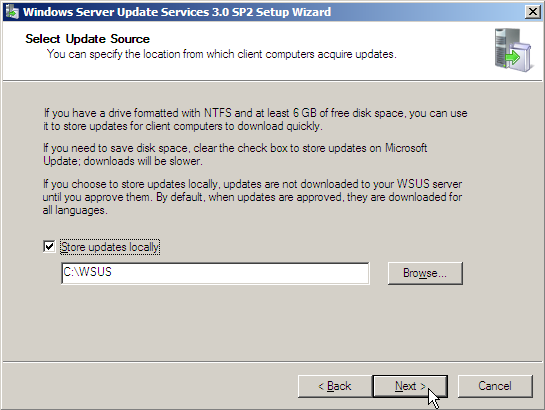
- Verify that Store updates locally is selected and that the path is set to C:WSUS, and then click Next.
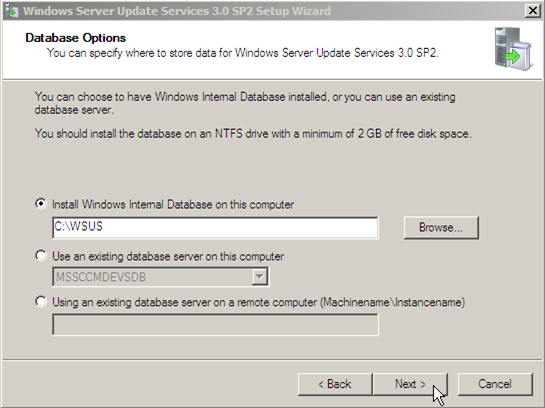
- Verify that Install Windows Internal Database on this computer is selected and that the path is set to C:WSUS, and then click Next.
NOTE: Change C: to the appropriate drive letter for your installation. It may be a better idea in some situations to store the updates on a drive separate from the Operating System installation.
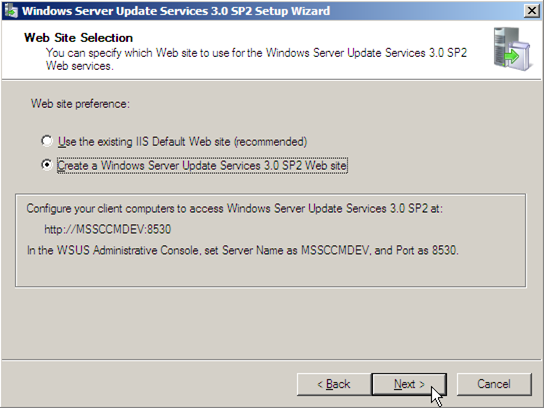
- Select Create a Windows Server Update Services 3.0 SP2 Web site, and then click Next.
NOTE: Do not select the option to use the IIS Default website! This may cause conflicts with the SCCM reporting feature.
- Review the settings, and then click Next to begin the installation.

- Wait patiently for the installation process to complete. This process may take several minutes.

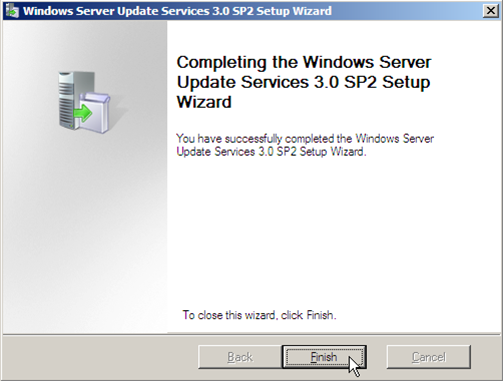
- Once the installation process completes, click on Finish.
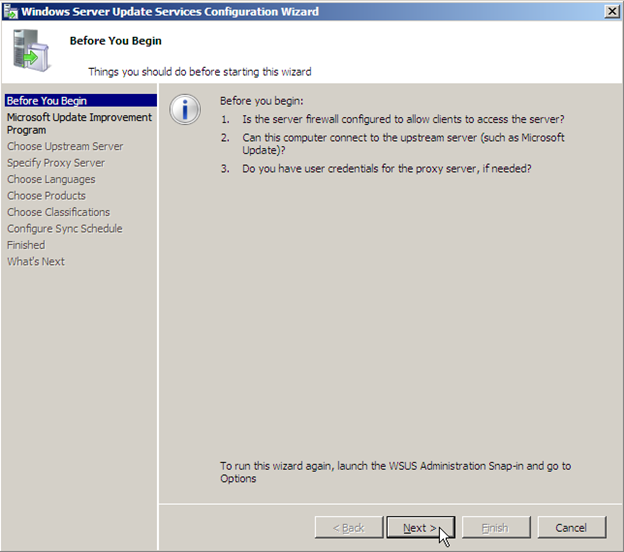
- The Windows Server Update Services Configuration Wizard will automatically open. On the Before You Begin page click Next.
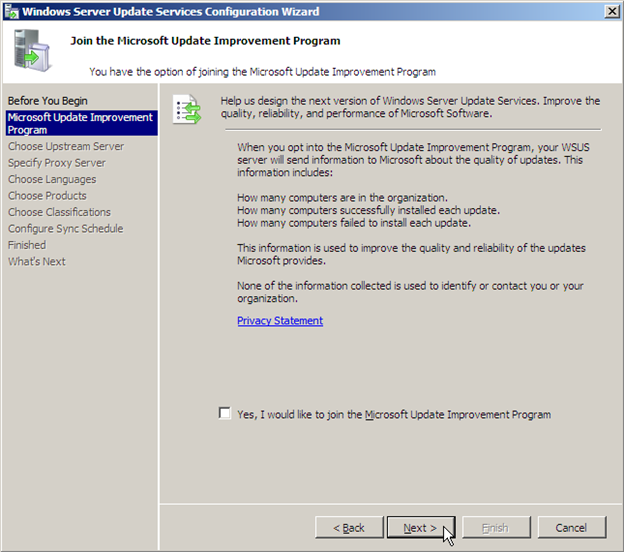
- On the Microsoft Update Improvement Program page, choose if you want to join the Microsoft Update Improvement Program or not, and then click Next.
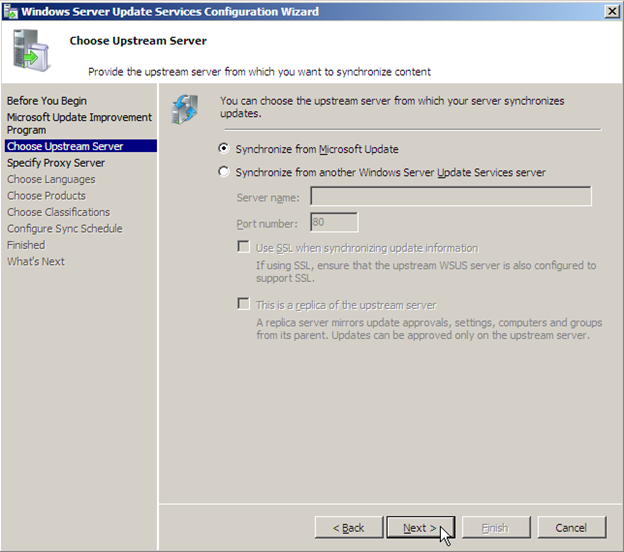
- On the Choose Upstream Server page, choose Synchronize from Microsoft Update if you don’t have another WSUS server or Synchronize from another Windows Server Update Services server if you have another WSUS server already set up, and then click Next.
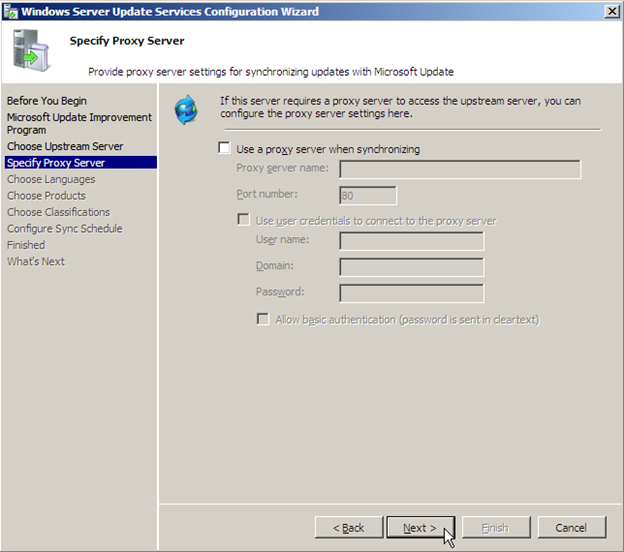
- On the Specify Proxy Server page, specify a proxy server if required for your environment, or click Next.
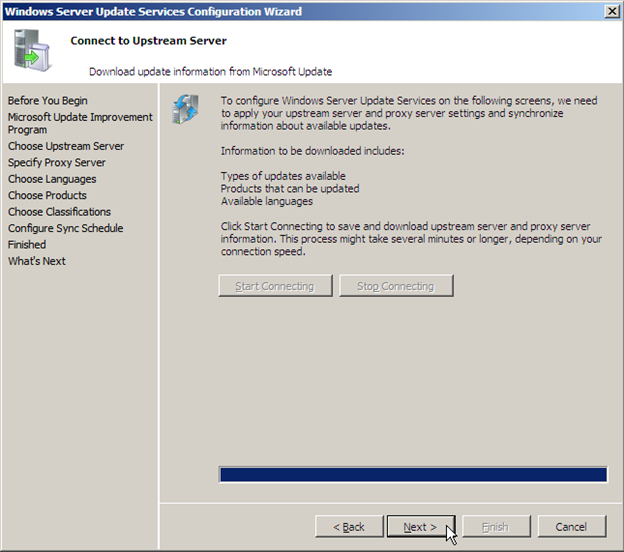
- Click on the Start Connecting button.

- Wait patiently for the connection to be made (the process may take several minutes) and then click Next.
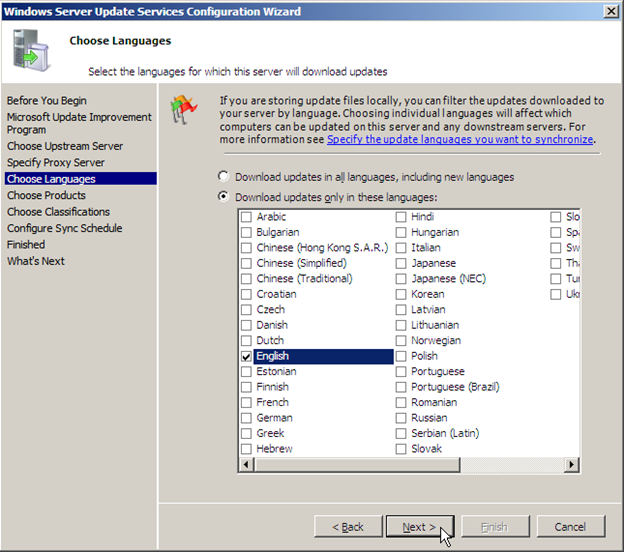
- On the Choose Languages page, select Download updates only in these languages and click OK at the Reducing Available Languages prompt. Put a check mark next to each language that is needed, and then click Next.
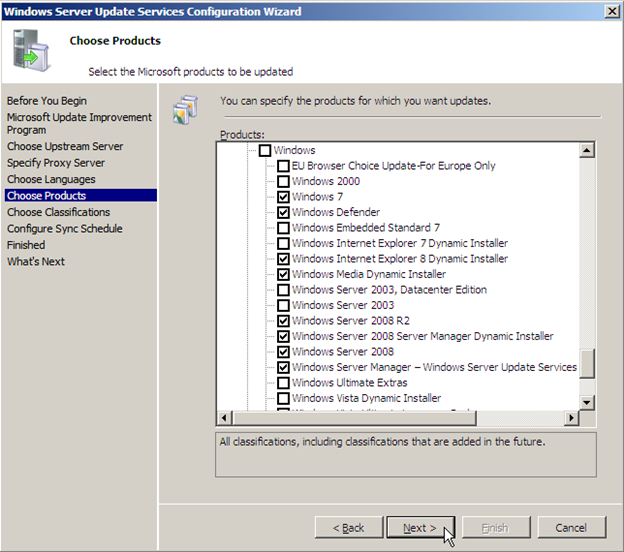
- On the Choose Updates page, put a check mark next to each product that needs to be updated through WSUS, and then click Next.
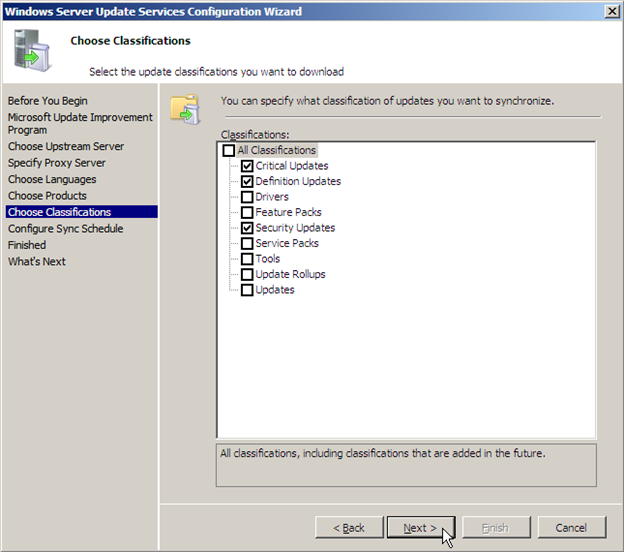
- On the Choose Classifications page, put a check mark next to each classification that you want to be synchronized, and then click Next.
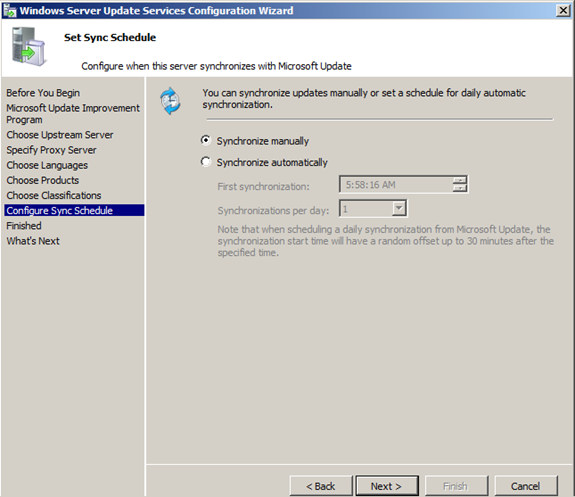
- On the Configure Sync Schedule page, choose Synchronize manually (not recommended) and then click Next.
NOTE: If the sync schedule is not set to manual, then SCCM will not be able to initialize synchronization.
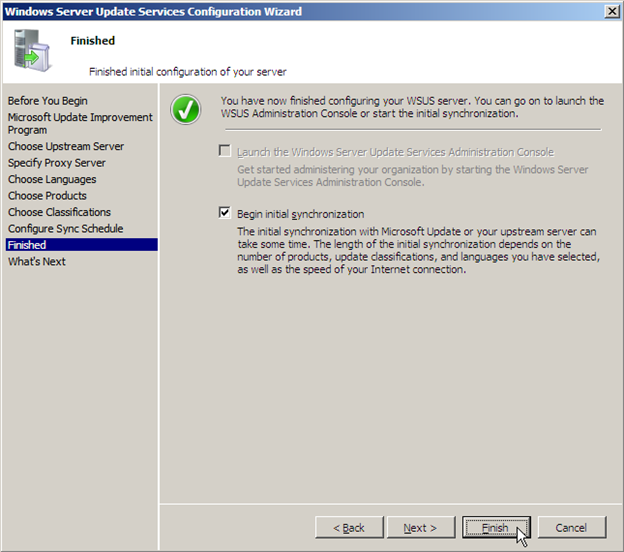
- On the Finish page, if you want to synchronize now, select Begin initial synchronization, and then click Finish.
Next in Part 8: Installing ConfigMgr 2007 Service Pack 1